
DIY Engine Cover Hardware Write-up LOTS of pics.
#1
 04-18-2007, 11:20 PM

So please bear (or bare?) with me on this write-up. Its my first one and I unfortunately didn't take pics as I was working through it. They were all taken after the fact.
This is for a 180TT. Obviously could be adapted to a 225.
First lets define a few things.
Engine Covers:
Coolant Cover
Battery Cover
Engine Cover
Front Covers (2 of these.)
The small L shaped engine cover was not part of this. The old 1/4 turn screws still work great.
Parts:
Part A: 7- 6mm x 20mm Cap Screw Socket (Plain Steel)

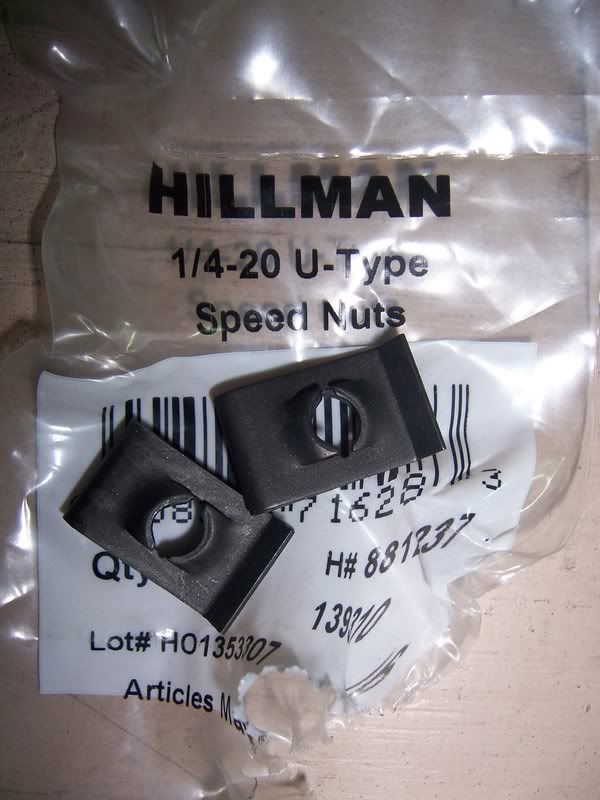
Part B: 3 - 1/4in 20 U-type Speed Nuts
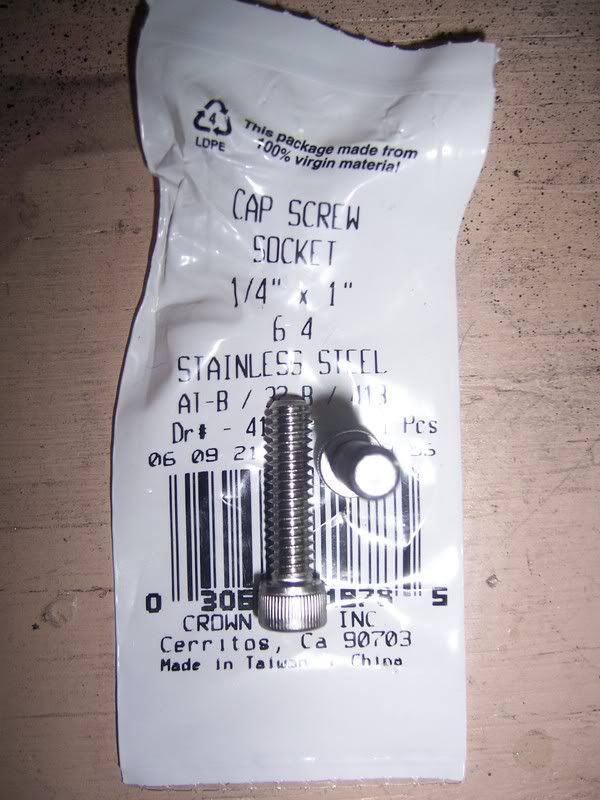
Part C: 6 - 1/4in x 1in Cap Screw Socket (Stainless Steel) I purposely used a different metal/finish because these are a different size.
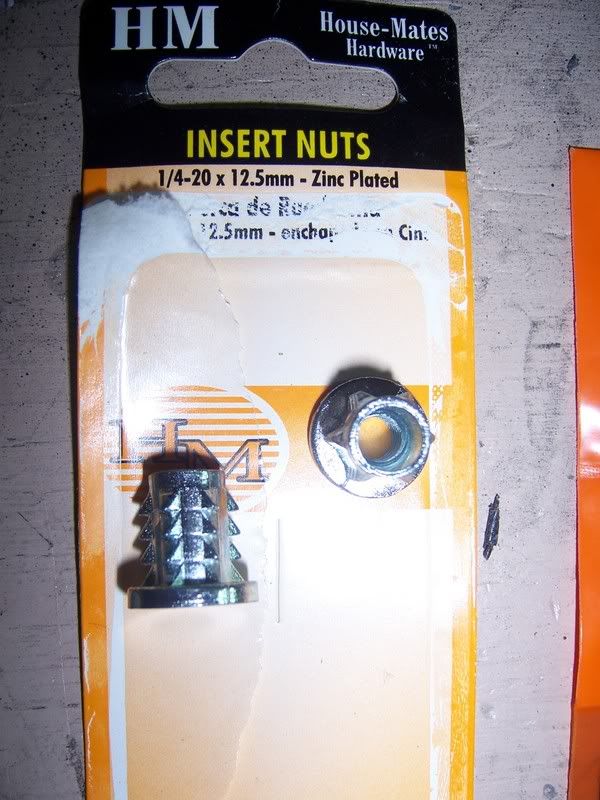
Part D: 6 - 1/4in 20 x 12.5mm Insert Nuts
Part E: 13 - #12 Finish Washers

Now onto the installation:
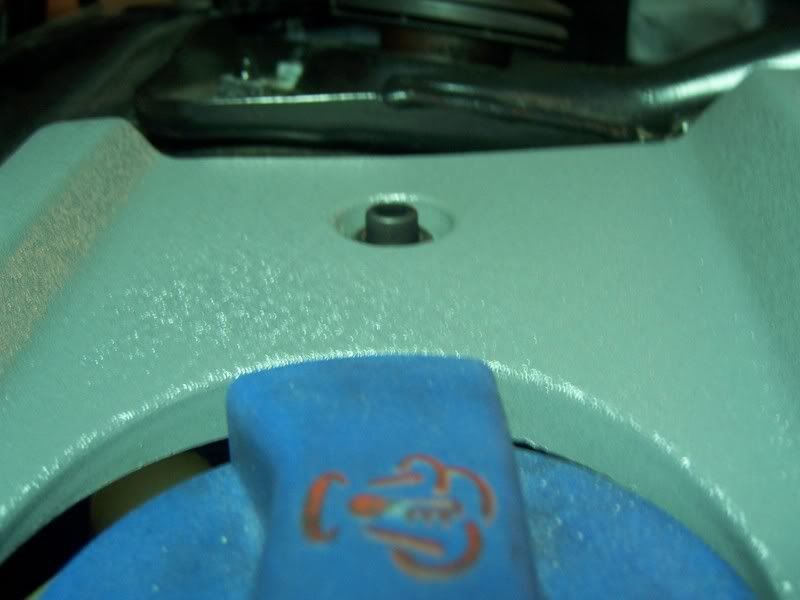
#1 We'll start with the 2 front Engine Covers. There are 6 attachment points for these 2 covers. You will need 6 of Part C, 6 of Part D, 6 of Part E. Start with removing the engine covers and enlarging the 6 attachment holes where the push pins go. Don't over large as you want part D to fit snuggly. Here is what it will look like once the part is pushed into the plastic.
Example 1: Far Right Side

Example 2: 2nd from Right

Example 3: Far away shot of 2 of theseattachment points.

Once this is done you can sit the 2 covers back on and use 6 of Part C and 6 of Part D to attach at each point. Here is an example of 1 attachment completed.
Example: Now this sits a little high and will actually touch the under side of the hood, but I wanted to be able to loosen and remove by hand rather than always having to use an allen wrench. You could opt for a flat head screw if you'd like.

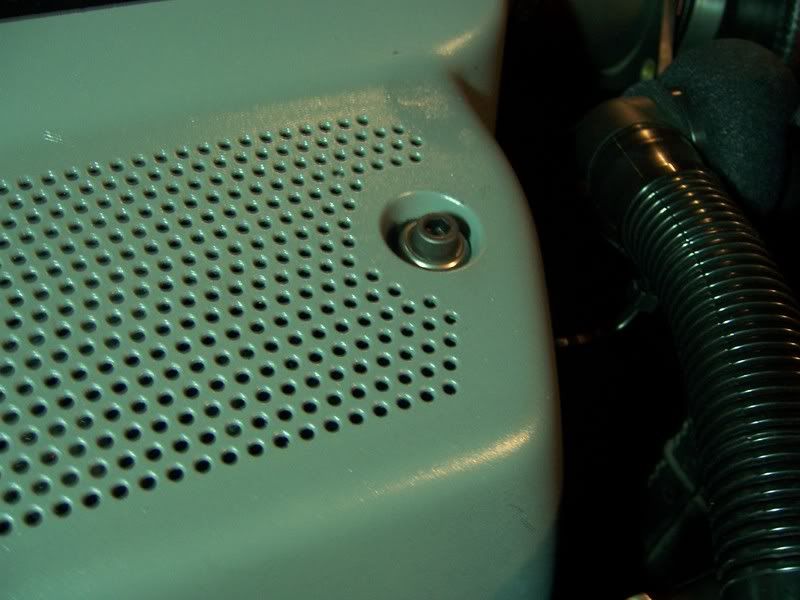
# 2 Coolant Cover: This is a piece of cake. You'll need 1 of Part A and 1 of Part E. It simply screws in where the old audi screw used to be. Here is the finished product.
Example:
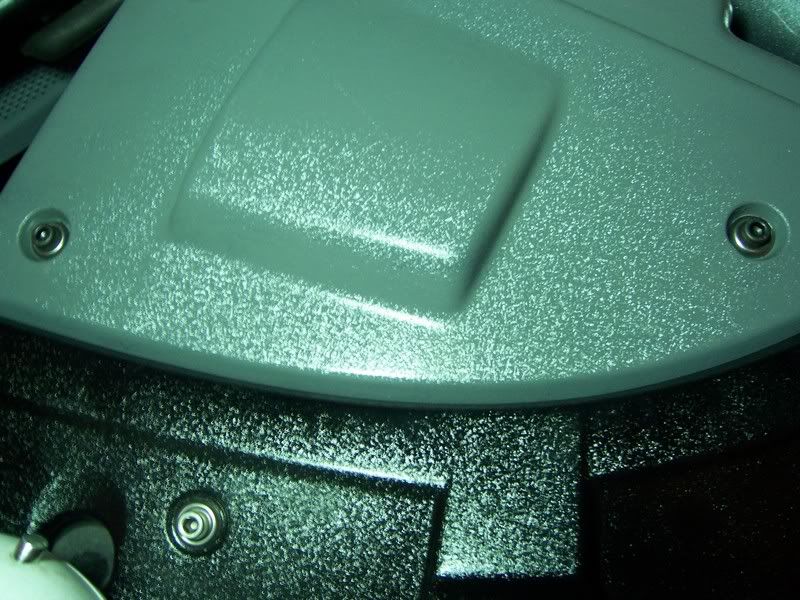
# 3 Battery Cover. This is also a piece of cake. Use 3 of Part A and 3 of Part E. They also simply screw in where the old audi screw used to be. Here is a shot of 2 of the 3 points.
Example:
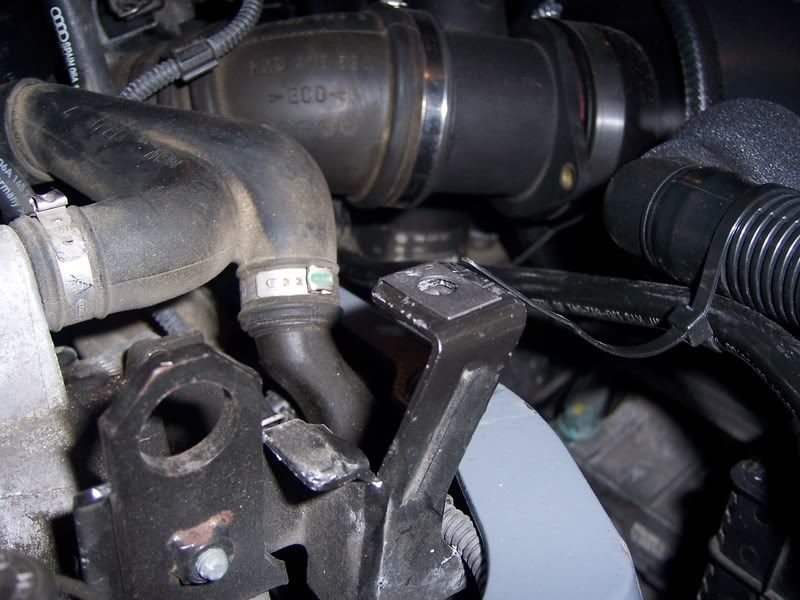
#4 Engine Cover. This is a little more involved. We are going to use 3 of Part A, 3 of Part E, and3 of Part B. You will need to use Part B in place of an old pressure clip that held on the 1/4 turn screw and the cover attachment points. The old clip pops out and the new 1/4in U Clip slides right on. There is a pic of this. Once you complete this task simply attach the engine cover the same as the coolant and battery cover.
Example 1: The U Clip in place of the old pressure clip at the engine cover attachment point.
Example 2, 3 and 4: Engine Cover attached.


Now you're completely finished and hopefully with better (more sercurely)attached engine covers. I also hope this write-up helps atleast 1 person. Its a pretty easy and straight forward installation. It also cost less than $20 total for all the parts.
Please PM or post if you have any questions and I can take extra pics and post if you'd like.
This is for a 180TT. Obviously could be adapted to a 225.
First lets define a few things.
Engine Covers:
Coolant Cover
Battery Cover
Engine Cover
Front Covers (2 of these.)
The small L shaped engine cover was not part of this. The old 1/4 turn screws still work great.
Parts:
Part A: 7- 6mm x 20mm Cap Screw Socket (Plain Steel)
Part B: 3 - 1/4in 20 U-type Speed Nuts
Part C: 6 - 1/4in x 1in Cap Screw Socket (Stainless Steel) I purposely used a different metal/finish because these are a different size.
Part D: 6 - 1/4in 20 x 12.5mm Insert Nuts
Part E: 13 - #12 Finish Washers
Now onto the installation:
#1 We'll start with the 2 front Engine Covers. There are 6 attachment points for these 2 covers. You will need 6 of Part C, 6 of Part D, 6 of Part E. Start with removing the engine covers and enlarging the 6 attachment holes where the push pins go. Don't over large as you want part D to fit snuggly. Here is what it will look like once the part is pushed into the plastic.
Example 1: Far Right Side
Example 2: 2nd from Right
Example 3: Far away shot of 2 of theseattachment points.
Once this is done you can sit the 2 covers back on and use 6 of Part C and 6 of Part D to attach at each point. Here is an example of 1 attachment completed.
Example: Now this sits a little high and will actually touch the under side of the hood, but I wanted to be able to loosen and remove by hand rather than always having to use an allen wrench. You could opt for a flat head screw if you'd like.
# 2 Coolant Cover: This is a piece of cake. You'll need 1 of Part A and 1 of Part E. It simply screws in where the old audi screw used to be. Here is the finished product.
Example:
# 3 Battery Cover. This is also a piece of cake. Use 3 of Part A and 3 of Part E. They also simply screw in where the old audi screw used to be. Here is a shot of 2 of the 3 points.
Example:
#4 Engine Cover. This is a little more involved. We are going to use 3 of Part A, 3 of Part E, and3 of Part B. You will need to use Part B in place of an old pressure clip that held on the 1/4 turn screw and the cover attachment points. The old clip pops out and the new 1/4in U Clip slides right on. There is a pic of this. Once you complete this task simply attach the engine cover the same as the coolant and battery cover.
Example 1: The U Clip in place of the old pressure clip at the engine cover attachment point.
Example 2, 3 and 4: Engine Cover attached.
Now you're completely finished and hopefully with better (more sercurely)attached engine covers. I also hope this write-up helps atleast 1 person. Its a pretty easy and straight forward installation. It also cost less than $20 total for all the parts.
Please PM or post if you have any questions and I can take extra pics and post if you'd like.
#2
04-18-2007, 11:31 PM

i like those better than the 42 draft designs....was this a local hardware store or a lowes or Home depot?
#3
04-18-2007, 11:33 PM
ORIGINAL: MeanAudiA6
i like those better than the 42 draft designs....was this a local hardware store or a lowes or Home depot?
i like those better than the 42 draft designs....was this a local hardware store or a lowes or Home depot?
#4
04-19-2007, 12:23 AM
The reason I used 2 different size Cap Screw Size Sockets was because I could not find a metric insert where the 2 front covers would attach.


Thread
Thread Starter
Forum
Replies
Last Post