How-to: 2004 A8 Oil Change Procedure
#1
I had heard much lamentation about the oil change procedure on the 2004 A8's - so much so, that I almost didn't look at the '04s. Good thing that I didn't believe the rumour mill. Turns out that, while it is a PITA to do, it's really not very difficult at all ... and when you're getting $250 quotes for the oil change from the local dealers, a little elbow grease is definitely called for.
If anyone knows the torque specs for the air intake box bolts and the oil drain plug, please let me know, and I'll update my posts.
2004 A8 Oil Change procedure
Parts:
1. Oil Filter *SEE NOTE*
2. Crush Ring
3. 9 quarts of Full Synthetic Oil (0W30, 5W30, 5W40)
**NOTE** I went to my local Audi dealer to pick up the oil filter from their parts department. This turned out to have been a very good thing, since, at least on the 2004 model year; there is more than one part number for the oil filter. You need to give your dealer your A8's VIN number, so they can give you the correct oil filter.
Required Audi parts:

Tools:
- Stubby Philips screwdriver
- Stubby flathead screwdriver
- Long Philips screwdriver
- 4mm Allen Wrench (hex-key)
- 10mm Allen Wrench (hex-key)
- 24mm socket or 15/16" socket
- Oil drain pan 10 gallon capacity
- Shop rags
(update: thanks to Grease for this info)
Tightening specification in Nm
- Oil filter cover 25 Nm
- Oil drain plug to oil filter housing 10 Nm
- Oil drain plug on oil pan 50 Nm
Also there is drain plug on the bottom of the oil filter housing, that way the oil can drain out into the pan before you remove the filter cartridge out (a little less mess). Siphoning works too.
l8r)
If anyone knows the torque specs for the air intake box bolts and the oil drain plug, please let me know, and I'll update my posts.
2004 A8 Oil Change procedure
Parts:
1. Oil Filter *SEE NOTE*
2. Crush Ring
3. 9 quarts of Full Synthetic Oil (0W30, 5W30, 5W40)
**NOTE** I went to my local Audi dealer to pick up the oil filter from their parts department. This turned out to have been a very good thing, since, at least on the 2004 model year; there is more than one part number for the oil filter. You need to give your dealer your A8's VIN number, so they can give you the correct oil filter.
Required Audi parts:

Tools:
- Stubby Philips screwdriver
- Stubby flathead screwdriver
- Long Philips screwdriver
- 4mm Allen Wrench (hex-key)
- 10mm Allen Wrench (hex-key)
- 24mm socket or 15/16" socket
- Oil drain pan 10 gallon capacity
- Shop rags
(update: thanks to Grease for this info)
Tightening specification in Nm
- Oil filter cover 25 Nm
- Oil drain plug to oil filter housing 10 Nm
- Oil drain plug on oil pan 50 Nm
Also there is drain plug on the bottom of the oil filter housing, that way the oil can drain out into the pan before you remove the filter cartridge out (a little less mess). Siphoning works too.
l8r)
Last edited by ludikraut; 11-24-2010 at 11:45 PM.
#2
Procedure:
** NOTE ** if you have a garage with a small lip and down sloping drive way, all you have to do to prepare for the oil change is to back the car into your garage and go into the MMI to raise your suspension to its maximum height. This provided me with ample clearance to work with. (see pic below)

1. Remove the undertray by unbolting the six (6) quick release screws from the tray, using a stubby flathead screwdriver.
Undertray removed from car:

Undertray screw close-ups:


2. Remove air intake box cover, using a Phillips head screwdriver to remove the bolts that secure the cover.
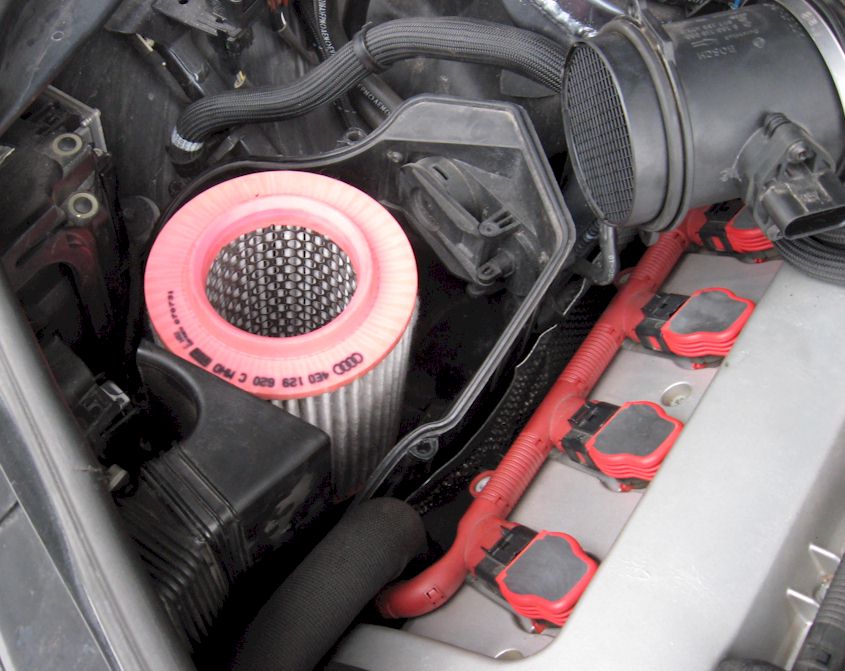
3. Remove air filter
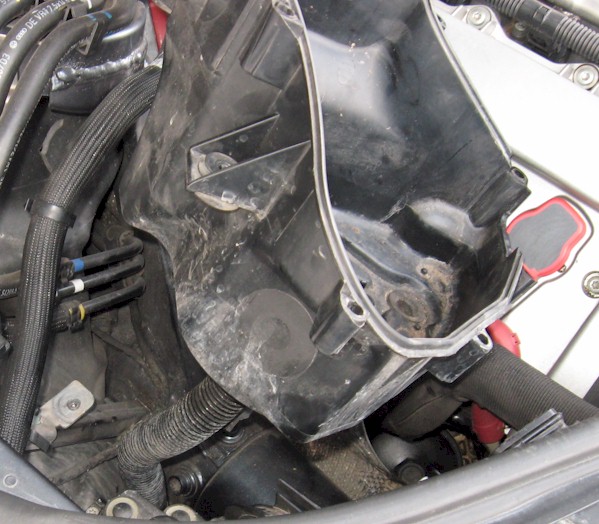
4. Remove bottom half of air intake box:
__a. Using a 4mm Allen wrench (hex key) to remove the bolts that hold it in place.
__b. Leave the snorkel/drain connected to the bottom of the air box, but disconnect it under the car
__c. Remove the bottom half of the air intake box and move it out of the way
Bottom of air intake box with 'snorkel':
** NOTE ** if you have a garage with a small lip and down sloping drive way, all you have to do to prepare for the oil change is to back the car into your garage and go into the MMI to raise your suspension to its maximum height. This provided me with ample clearance to work with. (see pic below)

1. Remove the undertray by unbolting the six (6) quick release screws from the tray, using a stubby flathead screwdriver.
Undertray removed from car:

Undertray screw close-ups:


2. Remove air intake box cover, using a Phillips head screwdriver to remove the bolts that secure the cover.

3. Remove air filter
4. Remove bottom half of air intake box:
__a. Using a 4mm Allen wrench (hex key) to remove the bolts that hold it in place.
__b. Leave the snorkel/drain connected to the bottom of the air box, but disconnect it under the car
__c. Remove the bottom half of the air intake box and move it out of the way
Bottom of air intake box with 'snorkel':

Last edited by ludikraut; 05-10-2010 at 10:17 PM.
#3
5. Drain oil from oil pan by removing the drain plug from the bottom of the oil pan
6. Remove the oil filter cap, using a 24mm socket or 15/16" socket. It'll take some wiggling to get the cap out, but it's doable.
Oil filter location:

Another angle of the oil filter location:

7. Remove oil filter (see notes below before removing)
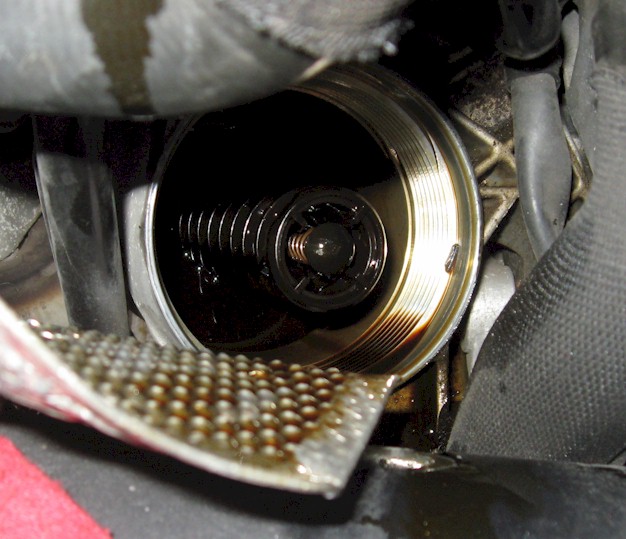
** NOTE ** as can be seen in the picture below, some oil remains in the filter housing. If you choose to siphon the remaining oil out of the housing, replace the same amount with fresh oil. This will help make the first start a little bit easier on the engine.
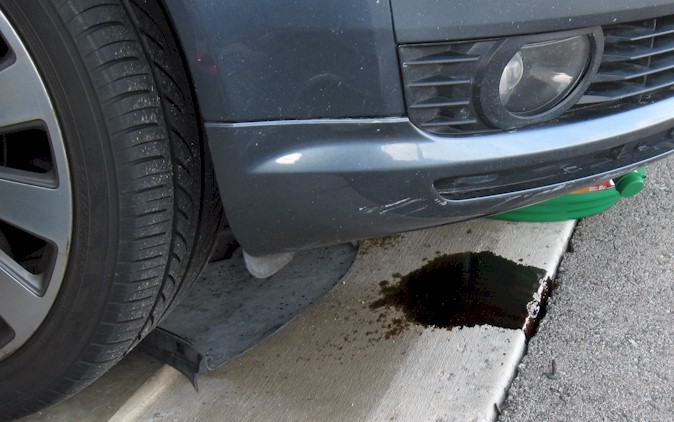
** NOTE ** as can be seen in the picture below, don’t forget to put something under the car to catch the dripping oil from the filter. It’s fairly messy getting the oil filter to come out.
6. Remove the oil filter cap, using a 24mm socket or 15/16" socket. It'll take some wiggling to get the cap out, but it's doable.
Oil filter location:

Another angle of the oil filter location:

7. Remove oil filter (see notes below before removing)
** NOTE ** as can be seen in the picture below, some oil remains in the filter housing. If you choose to siphon the remaining oil out of the housing, replace the same amount with fresh oil. This will help make the first start a little bit easier on the engine.

** NOTE ** as can be seen in the picture below, don’t forget to put something under the car to catch the dripping oil from the filter. It’s fairly messy getting the oil filter to come out.

Last edited by ludikraut; 05-10-2010 at 11:07 PM.
#4
9. Install new oil filter
10. Re-install oil filter cap – using a torque wrench, tighten to 24 Newton-Meters (nM)
** NOTE ** See the picture below for how to orient the oil filter cap when you’re trying to wiggle it back in place.
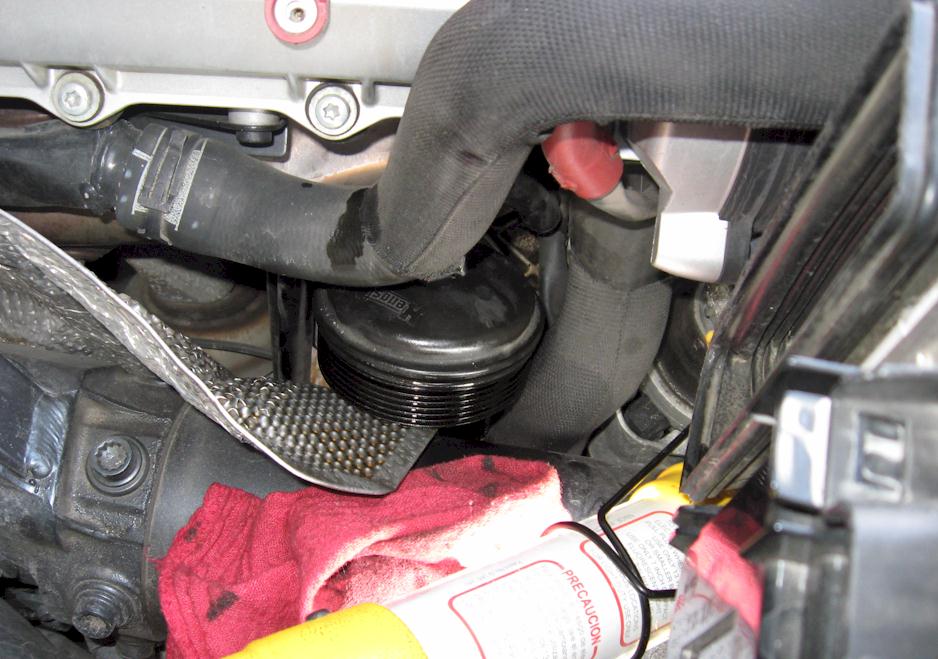
11. Re-install oil drain plug and new crush washer (TQ?)
12. Fill engine with oil – you’ll need about 9 quarts. I generally fill it with 8 quarts and then monitor the last quart.
13. Re-install the air box bottom
__a. Don't forget to reconnect the snorkel/drain back under the car
14. Clean and re-install air filter
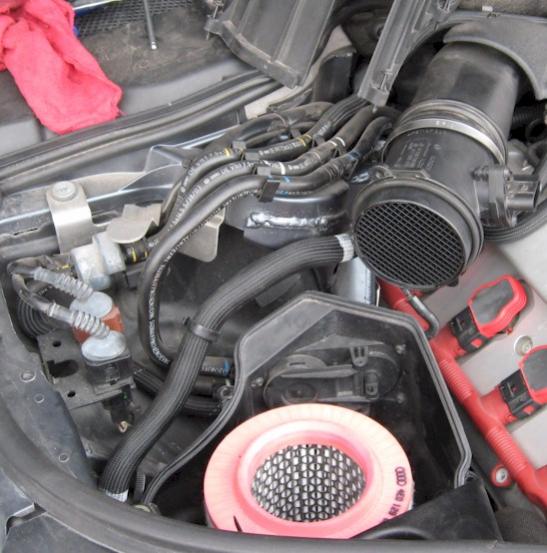
15. Re-install air box top cover
16. Start car - check for leaks
17. Re-install undertray
10. Re-install oil filter cap – using a torque wrench, tighten to 24 Newton-Meters (nM)
** NOTE ** See the picture below for how to orient the oil filter cap when you’re trying to wiggle it back in place.

11. Re-install oil drain plug and new crush washer (TQ?)
12. Fill engine with oil – you’ll need about 9 quarts. I generally fill it with 8 quarts and then monitor the last quart.
13. Re-install the air box bottom
__a. Don't forget to reconnect the snorkel/drain back under the car
14. Clean and re-install air filter

15. Re-install air box top cover
16. Start car - check for leaks
17. Re-install undertray
Last edited by ludikraut; 05-10-2010 at 11:13 PM.
#5
Alright, there you have it. Let me know if I missed any steps. I'll let this post sit out here for a couple of weeks and once I'm confident that no more corrections need to be made, I'll also post it as a PDF.
It took me about 3 hours to figure everything out the first time. I could probably do it in less than an hour these days.
l8r)
It took me about 3 hours to figure everything out the first time. I could probably do it in less than an hour these days.
l8r)
Last edited by ludikraut; 05-10-2010 at 11:41 PM.
#7
I've never done it that way LOL. I usually just disconnect the maf from the air box and pull the hole shabang at once. I can see this being easier though because it prevents you from stripping out the screws on the MAF sensor. Well done Sir, consider it STUCK!


