[complete] audi a6 halogen to bi xenon upgrade - pics
#11
finally, with it all bolted in, d2s also installed. With how cramped it is you can see why i bothered to tap the brackets...
the large connector in the bottom center is the external headlight harness conn, original to the 2001. The other connector you can see further down &; right is actually part of the ballast (it is unpainted metal, but in this pic seems to look black like the rest of the rear of the housing).
The brown/white wires put the halogen part of the high-beams in parrallel with the solenoid. If you are thinking about doing this yourself you will note how simple the wiring is!! In researching this myself to determine its viability, I was very confused by some pretty convoluted designs. Some have the high beam loop around needlessly (eg to the ballast & back)... was this done to confuse modders?? All cars (at least up until a few yrs ago, i'm not sure how the very latest models work) have a relay for high-beams back with the rest of the relays, etc, so the high-beam signal is really a full-current +/- pair...
As a rant, it would really seam smarter to send one power line around, and have devices switch power directly from that, nearest to where the actual load is.... On the other hand it does make total sense to use the tried-and-true in such a regulated industry (the auto ind...) but microcontrollers are already near all the important loads -such as the ballast for the headlight- and such a solution would save a lot of money in copper wire alone, not to mention production costs...
The blue wires you see are supposed to go to the auto-leveling system my car had stock. I can't remember if that was regulated for cars with the brighter xenons, or part of the sport package, ... either way the originally-halogen passenger side did not have this, so I left it off on the drivers as well, meaning I would have to manually allign them both.
The other wires you see towards the right side of shot (red, green, and there is one more not visible) are for the side blinker / running light).
PS: pay careful attention to polarity!! This should be obvious, and I sure though it was, until .... I had tested everything, checked it all twice, but after sealing, crimping, & heat-shrinking all the connections, it stopped working... I really can't describe my utter disappointment !!! although you may know exactly what i mean... well, after giving up and having a beer, I just sniped the brown & yellow wires & reversed them. It works! so i guess in my haste I crimped something else backwards in the now-sealed portion. I did prove, though, that the ballast is reverse voltage protected!! Although I would recommend a multimeter over try-and-reverse to determine the intended polarity of your settup (it isn't that hard
 [[see the next post for the wires, after I re-reversed them.]]
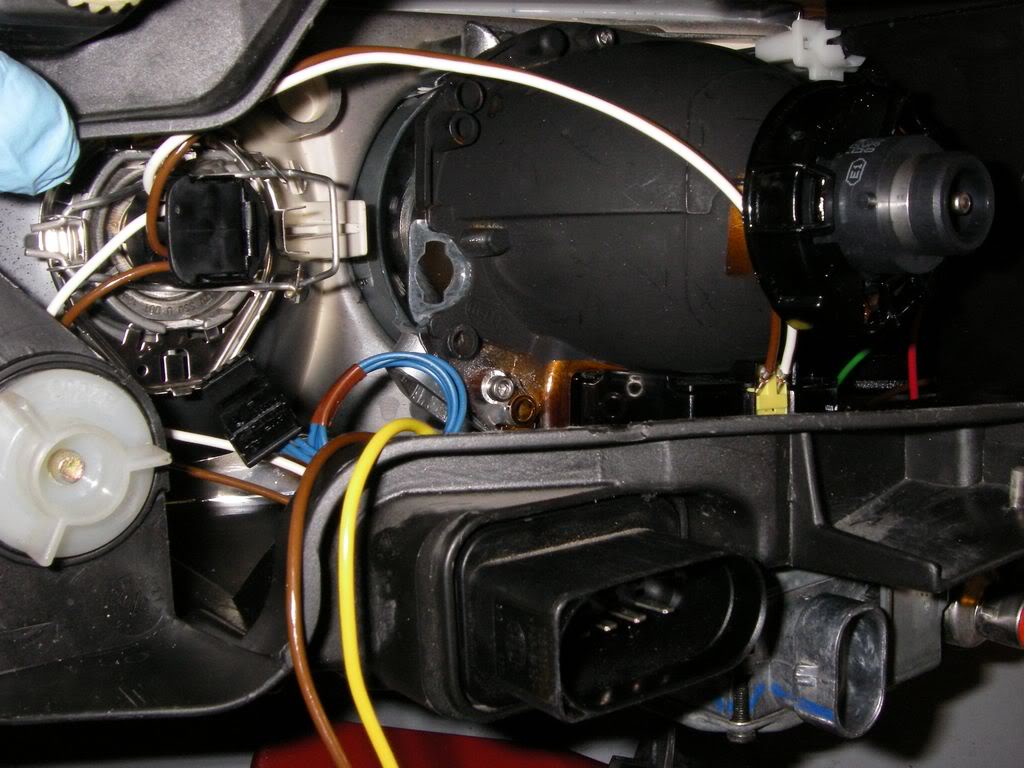
the large connector in the bottom center is the external headlight harness conn, original to the 2001. The other connector you can see further down &; right is actually part of the ballast (it is unpainted metal, but in this pic seems to look black like the rest of the rear of the housing).
The brown/white wires put the halogen part of the high-beams in parrallel with the solenoid. If you are thinking about doing this yourself you will note how simple the wiring is!! In researching this myself to determine its viability, I was very confused by some pretty convoluted designs. Some have the high beam loop around needlessly (eg to the ballast & back)... was this done to confuse modders??
 All cars (at least up until a few yrs ago, i'm not sure how the very latest models work) have a relay for high-beams back with the rest of the relays, etc, so the high-beam signal is really a full-current +/- pair...
 As a rant, it would really seam smarter to send one power line around, and have devices switch power directly from that, nearest to where the actual load is.... On the other hand it does make total sense to use the tried-and-true in such a regulated industry (the auto ind...) but microcontrollers are already near all the important loads -such as the ballast for the headlight- and such a solution would save a lot of money in copper wire alone, not to mention production costs...
The blue wires you see are supposed to go to the auto-leveling system my car had stock. I can't remember if that was regulated for cars with the brighter xenons, or part of the sport package, ... either way the originally-halogen passenger side did not have this, so I left it off on the drivers as well, meaning I would have to manually allign them both.
The other wires you see towards the right side of shot (red, green, and there is one more not visible) are for the side blinker / running light).
PS: pay careful attention to polarity!! This should be obvious, and I sure though it was, until .... I had tested everything, checked it all twice, but after sealing, crimping, & heat-shrinking all the connections, it stopped working... I really can't describe my utter disappointment
 !!! although you may know exactly what i mean... well, after giving up and having a beer, I just sniped the brown & yellow wires & reversed them. It works! so i guess in my haste I crimped something else backwards in the now-sealed portion. I did prove, though, that the ballast is reverse voltage protected!! Although I would recommend a multimeter over try-and-reverse to determine the intended polarity of your settup (it isn't that hard
 [[see the next post for the wires, after I re-reversed them.]]
Last edited by mboard182; 03-06-2010 at 12:52 AM.
#12
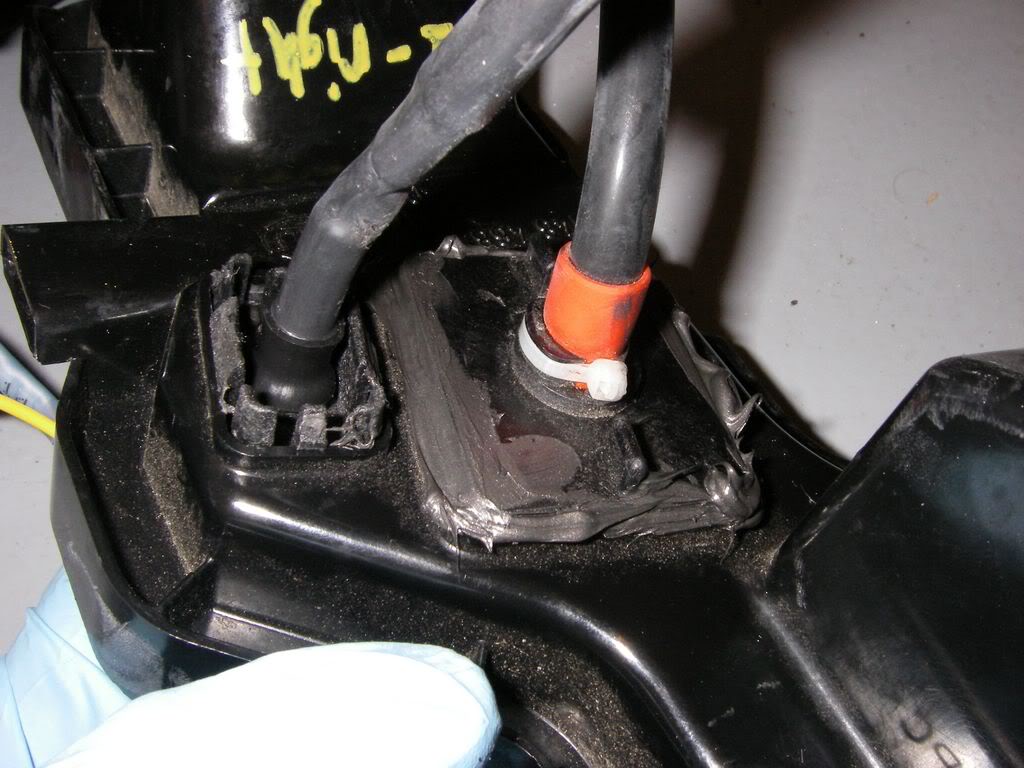
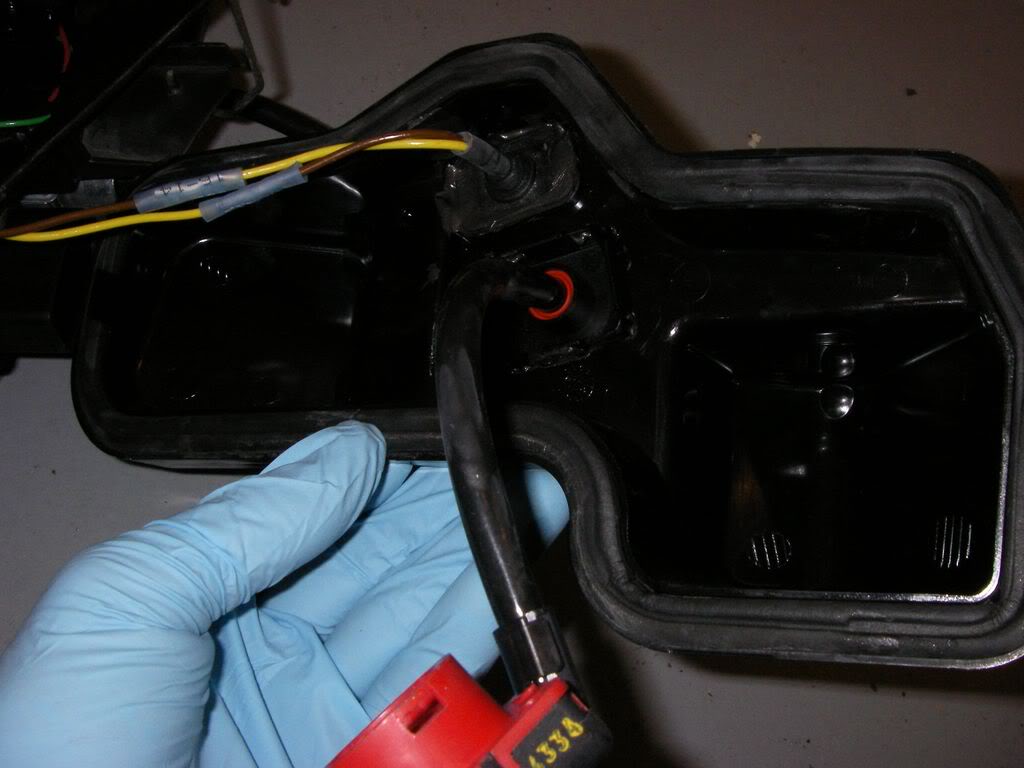
The exterior connections...
The halogen model of the headlamp lacks the square hole for the high-voltage line from the ballast to the hid bulb, so I had to dremel one, and hence the liberal use of gasket material!
Note the VW brands mostly use d2s and thus the ignitor is built into the ballast. On other cars, D1s is used, in which the bulb has a square metal thing at the back, which is the ignitor. Still more varieties appear to use d2s bulbs but have an ignitor inline between the ballast and bulb...
The d1s is a much better design, imho, as it allows much more freedom in placing the ballast. Hid bulbs operate at high voltages relative to std 12 / 24 volt stuff, but only at light off (eg ignition) are extremely high voltages needed. Impedence of the wiring becomes very significant at the voltages used during ignition, and thus length of the wire carrying this signal must be kept short. I don't have any hard numbers, but with the ignitor integeral to the bult, the balast could be located at least a few feet away.
But my donor projectors accept the d2s variety, and the hella ballasts bolt on without modificaiton, hence I stuck with them...


Last edited by mboard182; 03-06-2010 at 12:52 AM.
#13
WOW...
Yes, I would do this mod again. It did take pretty much 2-days solid, but that included a ton of trial and error, not to mention all the effort that lead up to the oven incident
I LOVE having bi-xenons. They really are bright as hell... As I discussed the plate in the image plane that gives you that crisp cut-off of hid's also just plain blocks a ton of output. So when the solenoid lifts the plate some, a lot of extra light gets through. Plus, of course, the 55w high beam...
I bought a set of d1s electronics, if I get around to it I am going to mod them into my foglights... I know at the oem level philips & osram sell different color temps, but I could not find anything other than the std 4100k - that mod would be way cooler if I could find an authentic 3000k fog light hid bulb... (suggestions welcome!!!!)
As I write that last bit I realize when most people think of something else when I mention different color temperature... I should be able to sum up my thoughts on that pretty succinctly - ultra-high kelvin ( 6000k, 8000 k, etc) are IDIOTIC !!! If you are reading this and take offense - please DON'T ... chances are you have are a victim of misinformation & various crap-pedaling schemes ... take the time to inform yourself, you will undoubtably learn cool stuff in the process. Back in high school I found the site http://intellexual.net which has one of the best, unbiased HID facts & tutorial section
Here's the the lights on after everthing was put back in.... It took a few minutes to get them aligned from how they started out here, but overall it worked flawlessly.
Thanks for reading!
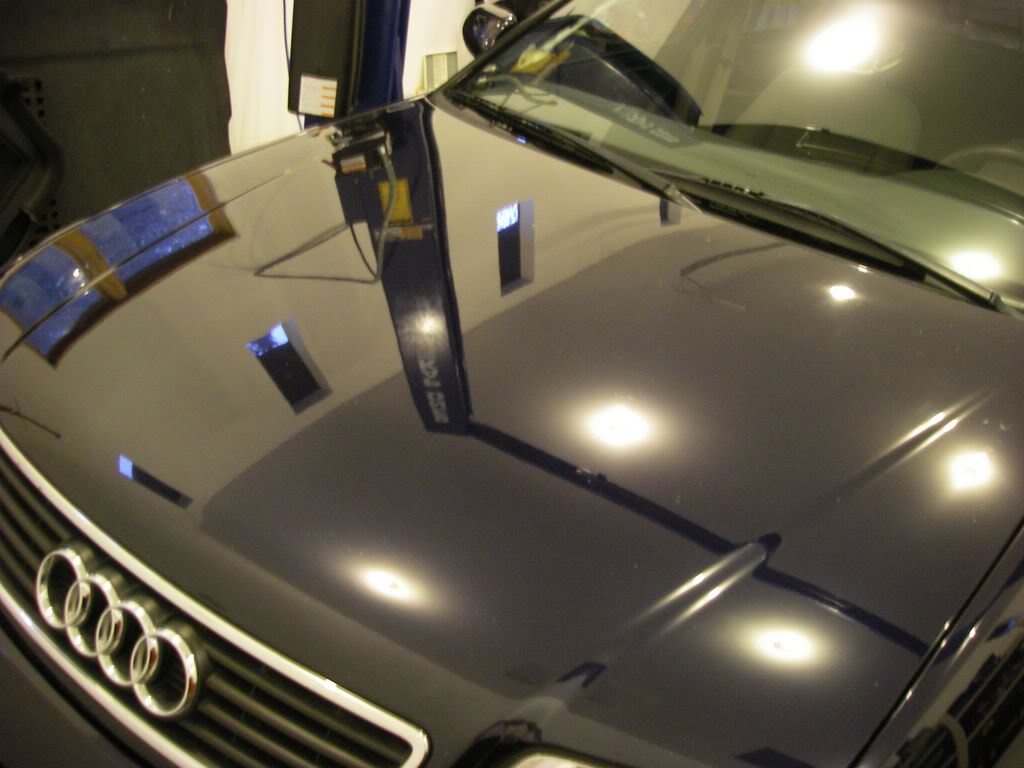
damn, what a spoiler! I can't find the picture of the lights aligned. Oh well, you'll just have to take my word for it. But then again, 'pretty sure I would have bee pulled over by now if they were as bad as the pre-adjusted (next pic)
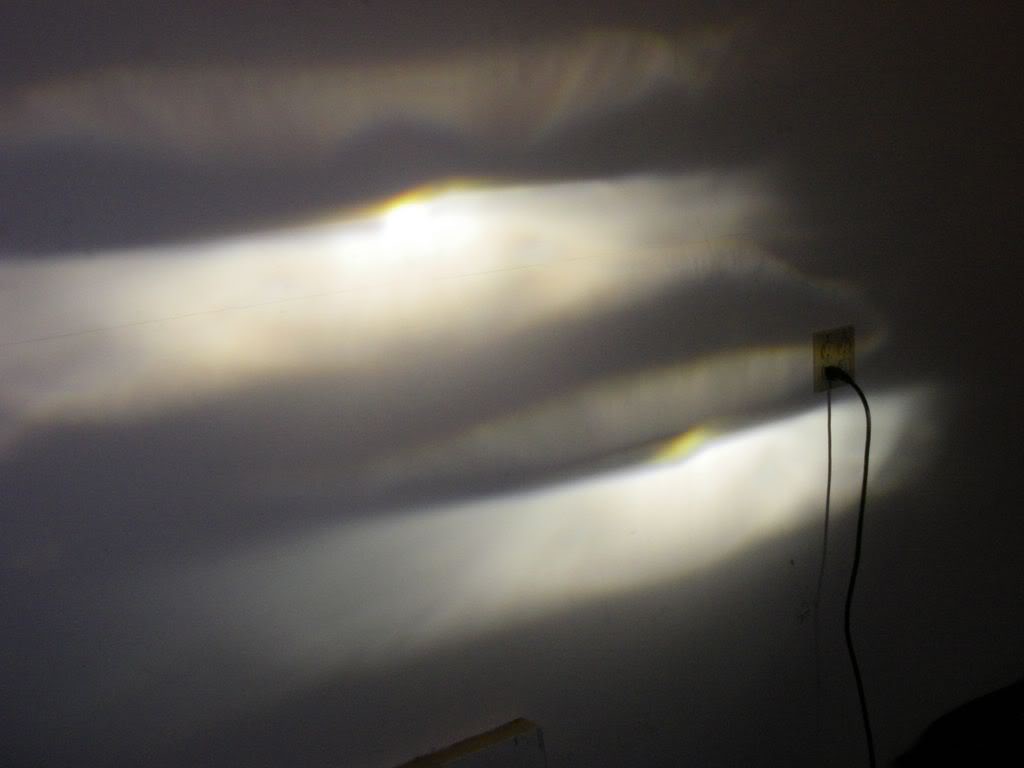
<right after closing the hood for the first time in 2 days!!!
Yes, I would do this mod again. It did take pretty much 2-days solid, but that included a ton of trial and error, not to mention all the effort that lead up to the oven incident

I LOVE having bi-xenons. They really are bright as hell... As I discussed the plate in the image plane that gives you that crisp cut-off of hid's also just plain blocks a ton of output. So when the solenoid lifts the plate some, a lot of extra light gets through. Plus, of course, the 55w high beam...
I bought a set of d1s electronics, if I get around to it I am going to mod them into my foglights... I know at the oem level philips & osram sell different color temps, but I could not find anything other than the std 4100k - that mod would be way cooler if I could find an authentic 3000k fog light hid bulb... (suggestions welcome!!!!)
As I write that last bit I realize when most people think of something else when I mention different color temperature... I should be able to sum up my thoughts on that pretty succinctly - ultra-high kelvin ( 6000k, 8000 k, etc) are IDIOTIC !!! If you are reading this and take offense - please DON'T ... chances are you have are a victim of misinformation & various crap-pedaling schemes ... take the time to inform yourself, you will undoubtably learn cool stuff in the process. Back in high school I found the site http://intellexual.net which has one of the best, unbiased HID facts & tutorial section
Here's the the lights on after everthing was put back in.... It took a few minutes to get them aligned from how they started out here, but overall it worked flawlessly.
Thanks for reading!

damn, what a spoiler! I can't find the picture of the lights aligned. Oh well, you'll just have to take my word for it. But then again, 'pretty sure I would have bee pulled over by now if they were as bad as the pre-adjusted (next pic)

<right after closing the hood for the first time in 2 days!!!
Last edited by mboard182; 03-06-2010 at 12:55 AM.
#14
I finished this project almost exactly a year ago (early-mid 2007)... absolutely no problems, and I still smile inside when I get the chance to use the brights 
Also, this might help people looking into this mod: At least for m.yr. 2001, housings for halogen headlights and xenon (single-xenon only for this m.y.) are identical. The projectors themselves are different, but are externally the same size & have the same bolt patterns. The only difference is in the housing itself is in the back cover (what you have to take off to change a bulb) which in the xenon version has a rectangular hole for the high-voltage cable. Electronics for xenon-2001 and bixenon-2002 are the same of different in trivial ways. The only thing you need to watch out for, especially if doing a swap with some other model car, is for ballasts that are on a can-bus of or some other communication protocol. If the ballast has only two terminals, the are + and -, and you are ok. If it has more than 2, make sure you know what the pins do before buying!

Also, this might help people looking into this mod: At least for m.yr. 2001, housings for halogen headlights and xenon (single-xenon only for this m.y.) are identical. The projectors themselves are different, but are externally the same size & have the same bolt patterns. The only difference is in the housing itself is in the back cover (what you have to take off to change a bulb) which in the xenon version has a rectangular hole for the high-voltage cable. Electronics for xenon-2001 and bixenon-2002 are the same of different in trivial ways. The only thing you need to watch out for, especially if doing a swap with some other model car, is for ballasts that are on a can-bus of or some other communication protocol. If the ballast has only two terminals, the are + and -, and you are ok. If it has more than 2, make sure you know what the pins do before buying!
Last edited by mboard182; 03-06-2010 at 12:57 AM.
#15
finally got around to getting the pictures in here correctly (two years is a BIT late, I know  but hopefully someone will find this useful, it is still a pretty popular car.
Also I think I've shown that you can find a way to cram most projector units in... The only true no-go would be if the overall diameter of the projector's reflector housing wouldn't fit in the headlight body.
I would **DEFINITELY** recommend bixenons. They are unbelievably bright - it is even night and day from my old setup with one xenon bulb. Additionally, I find that on low beams the 2002+ hella projectors are brighter than the 2001's. It's good to know they make progress...
Note that the for the model year 2001, at least, halogen and NON-bi-xenon projector assemblies have the exact same size and bolt pattern. The only thing that is different is the mount for the bulb, and perhaps the curvature of the optics.
 but hopefully someone will find this useful, it is still a pretty popular car.
Also I think I've shown that you can find a way to cram most projector units in... The only true no-go would be if the overall diameter of the projector's reflector housing wouldn't fit in the headlight body.
I would **DEFINITELY** recommend bixenons. They are unbelievably bright - it is even night and day from my old setup with one xenon bulb. Additionally, I find that on low beams the 2002+ hella projectors are brighter than the 2001's. It's good to know they make progress...
Note that the for the model year 2001, at least, halogen and NON-bi-xenon projector assemblies have the exact same size and bolt pattern. The only thing that is different is the mount for the bulb, and perhaps the curvature of the optics.
Last edited by mboard182; 03-06-2010 at 01:00 AM.
#16
I've posted all the pictures on photobucket: http://pbckt.com/sm.FLs
or search for the user (on photobucket) 2001_audi_a6
There are ~60 pics. Many are referenced below in this thread, plus some additional detail. I've labeled the pictures, but if you have questions go ahead and post one or a link to it hear & i'll help you figure out what's up.
If you are trying to figure out what projector you have (or need) for your 2001 and prior, or 2002 and later a6, I have side-by-sides of all the important dimensions, with rulers in the pic for rough measurements. (perhaps applicable to other models, a4, etc)
If I get the time I'll try and go back and edit my tutorial below with the pictures I originally referenced.
#17
I have an old PM asking about a different model upgrade (acura TL), specifically about the length of the new projector I put in being longer than the original 2001 version.
Yes, as shown in the pics (photobucket if they aren't below) the 2002+ (b6) projector is significantly longer than the 2001- (b5). In this case it happened to fit inside the b5 housing just fine.
However, I didn't really know if it would fit until I was done, so I considered having to seal it in.
I don't think it would be rocket science to cut a new hole in the back of the housing of other models - if it doesn't fit, and you really want bixenon (this model is insanely bright...) then it is my *impression* from having this all apart that some combination of basic fab & epoxy/silicon could achieve a permanent seal.
Hope that helps. YMMV, as always
Thread
Thread Starter
Forum
Replies
Last Post
headlightcreations.com
B7 Models
0
07-10-2010 11:25 PM
PartsPro0101
Archive - Exterior/Body
3
06-04-2008 12:29 PM


